Take Photos from Good to Great
Posted: October 31, 2014
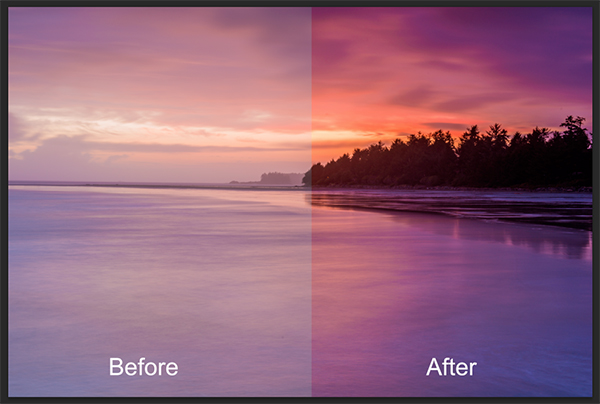
[caption id="attachment_12088" align="alignright" width="377"] Image from digital-photography-school.com[/caption]
Taking good photos usually isn't too hard. The editing that is done after the photo is taken, however, is what can make the difference between good and great. Learn the tools to use to help your photos achieve greatness.
Barry J Brady, writer for Digital Photography School, shares how to turn your photos from good to great.
5 Photoshop Tools to Take Your Images from Good to Great
We hear it all the time, “That photo has been Photoshopped”. Sometimes it sounds like the photo has caught a disease or that Photoshop is some undesirable effect that has been added to the image. Photoshop is the KEY to making your good images look spectacular. Yes, I said “good” images. Photoshop is not about fixing mistakes or trying to rescue a bad shot. It is more about refining your images and making them look amazing without overdoing it. Photoshop is a fantastic tool when it is used effectively but can be your enemy when you overdo it. Depending on what you want to achieve with your photos, this quick guide to five Photoshop tools will help you adjust your exposure effectively and make the colour really pop out of your image.NOTE: the examples in this article simply show you how to make the adjustments on a separate layer. You could also use an adjustment layer which gives you much more control over the adjustment. The only tool that can’t be used with an adjustment layer is Shadow and Highlights. I will go into more details about adjustment layers in upcoming articles, for now, if you follow these guidelines, your images will look compelling and rich without looking overdone.
1. Shadow and Highlights Tool This tool will be used to get more detail in the shadow areas of your image. Modern cameras can capture lots of detail, but depending on the light in the scene you are shooting, the shadows may be a little dark. Read the entire article 5 Photoshop Tools to Take Your Images from Good to Great on Digital Photography School.